
Is your linoleum floor looking dull, sticky, or streaky no matter how many times you mop? That's a sign you're using the wrong technique — not that the floor is beyond saving. Knowing how to clean linoleum floors correctly comes down to understanding what the material actually is, which products work with it, and which habits quietly cause damage over years of use. This guide walks you through everything: daily maintenance, targeted stain removal, deep-cleaning methods, and the mistakes that prematurely age your floor. For more practical home care guides, browse Linea's cleaning section.
Linoleum has been a trusted flooring choice in kitchens, bathrooms, and commercial spaces for over 150 years. It's resilient, eco-friendly, and surprisingly easy to maintain — but only when you treat it correctly. The problem is that most people confuse linoleum with vinyl and apply the wrong cleaning logic. That mismatch leads to dull finishes, warped seams, and floors that never look quite right regardless of how much effort you put in.
The fix is straightforward once you understand what you're working with. Whether you're tackling a grimy kitchen floor, a scuffed entryway, or stubborn buildup that's been sitting for months, this guide gives you a reliable system that works every time.
Contents
Before you can maintain linoleum floors effectively, you need to understand what you're actually cleaning. Linoleum is made from natural materials — linseed oil, cork dust, wood flour, and mineral pigments bonded to a jute or canvas backing. That composition is what makes it biodegradable, naturally antimicrobial, and warm underfoot. It's also what makes it sensitive to cleaning products that work perfectly fine on other hard floors. According to Wikipedia's history of linoleum, the material has been in continuous production since the 1860s, and modern versions follow the same core chemistry. Knowing that chemistry tells you exactly what to use — and what to avoid.
Many people call their floors "linoleum" when they actually have sheet vinyl or luxury vinyl plank. The distinction matters enormously for cleaning. Genuine linoleum has color and pattern that runs through the entire thickness of the material — there is no surface print that can wear away. Vinyl has a photographic layer on top, making it fully waterproof and more forgiving of moisture exposure. Linoleum, by contrast, can swell or lift at the seams if water sits on it for any extended period. If you're unsure which material you have, check the edge of a loose corner: solid color through the thickness means linoleum; a printed top layer over a white or gray base means vinyl. That one check changes your entire approach.
Linoleum doesn't tolerate steam mops, bleach solutions, or ammonia-based cleaners. These strip the natural protective finish and cause the surface to yellow, crack, or turn permanently dull. The material also dislikes standing water for the same reason it dislikes steam — prolonged moisture exposure breaks down the linseed oil binder over time. None of these are deal-breakers. They are parameters that dictate your tool and product choices, and once you internalize them, cleaning becomes simple.
Not every dull-looking linoleum floor needs a full deep-clean. Reading the floor correctly saves you time and prevents unnecessary wear from over-cleaning — which is a real problem, not just a theoretical one.
Your floor is signaling that it needs more than a routine mop when you notice a sticky residue that doesn't lift with a damp mop, visible yellowing or graying concentrated in high-traffic zones, or a persistent dull film that survives regular cleaning. These are symptoms of wax buildup, soap residue, or oxidized linseed oil — all of which require a stripping solution and a fresh protective finish to resolve. For well-maintained floors, deep cleans should happen two to four times per year depending on foot traffic levels. High-traffic kitchens and entryways need it more often than rarely-used guest rooms or hallways.
Avoid steam mopping entirely — it is not appropriate for linoleum regardless of how dirty the surface looks. Skip abrasive scrub pads, which scratch the finish and make the floor more vulnerable to future staining. If the floor was just mopped or recently exposed to spills, let it dry completely before cleaning again. Cleaning a still-damp floor drives grit into the surface instead of removing it. The rule is simple: dry first, then clean. This applies even when you're in a hurry.
Consistency beats intensity every time. A simple, regular routine keeps linoleum looking clean with minimal effort — and it dramatically extends the time between deep cleans, saving you both time and money on products.
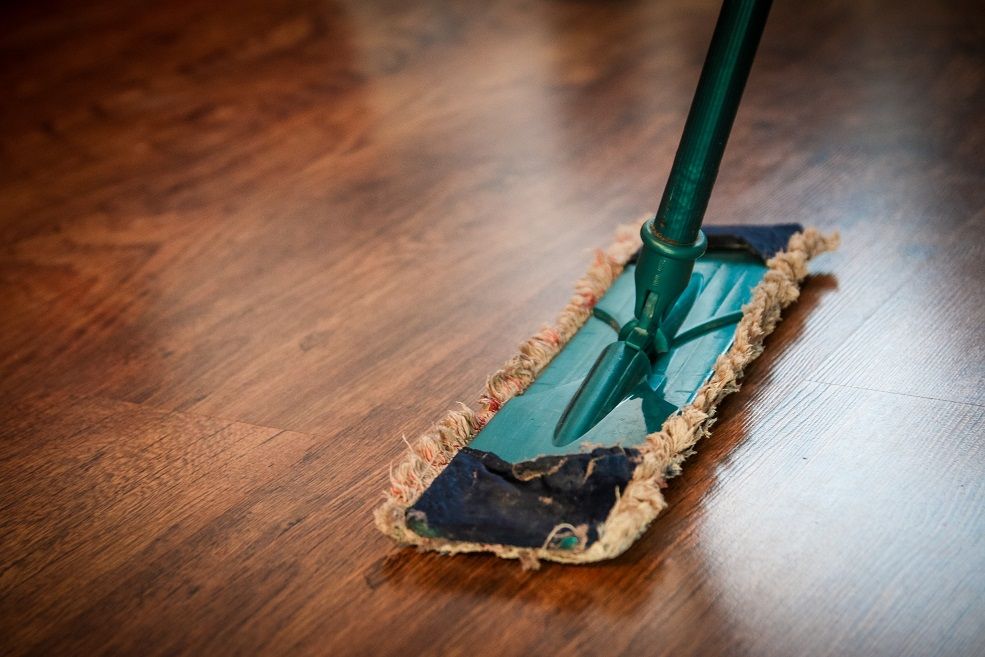
Dry sweeping or dust mopping daily is the single most effective thing you can do for your linoleum floors. Grit and fine debris act like sandpaper underfoot — every step grinds particles into the surface and dulls the finish over time. A microfiber flat mop covers most kitchen or bathroom floors in under five minutes. Forget the traditional broom for this task; it redistributes fine particles rather than capturing them. Microfiber picks them up and holds them. If you do use a vacuum instead of a mop, make sure the setting is appropriate for hard floors — the beater bar on carpet mode can scuff the surface.
Pro tip: Wring your mop out so thoroughly before mopping that it feels almost dry to the touch — this is the single most important technique for protecting linoleum from moisture damage.
Once a week, damp-mop with a pH-neutral cleaner diluted in warm water. Work in sections, overlapping slightly, and let the floor air dry completely before anyone walks on it. Avoid letting water pool in corners or along baseboards — those are exactly the spots where seam lifting starts. This weekly routine, combined with daily dust mopping, keeps most linoleum floors looking fresh indefinitely without requiring aggressive cleaning or expensive treatments.
Different stains require different approaches. Using the right product on the right mess gets results faster and avoids the surface damage that comes from reaching for whatever's under the sink.
Black heel marks and rubber scuffs are among the most common complaints from linoleum owners. A small amount of WD-40 or rubbing alcohol on a cloth lifts these marks quickly without harming the surface. Apply it to the cloth, not directly to the floor, and rub in a circular motion. Follow up with a damp cloth to remove any residue. For lighter scuffs, a pencil eraser applied with gentle pressure often does the job without any product at all — and it leaves no residue behind. This is one case where less is genuinely more.
Grease buildup near the stove responds well to a solution of warm water with a few drops of dish soap. Apply it with a soft cloth or soft-bristle brush, work it into the stain, then rinse with a clean damp cloth. Don't let soapy water sit — soap residue is one of the leading causes of the sticky, dull film that makes linoleum look worse after cleaning rather than better. For persistent grease stains, a paste of baking soda and water left for five minutes before wiping usually finishes the job without any risk to the surface finish.
Cleaning linoleum is not the same as cleaning hardwood, laminate, or ceramic tile. If you have multiple floor types in your home, understanding the differences prevents you from carrying bad habits from one surface to another. Our guide on how to clean hardwood floors covers the overlap in detail — both materials dislike excess moisture and harsh chemicals — but there are meaningful differences in what each tolerates.
| Cleaning Method | Linoleum | Hardwood | Laminate | Ceramic Tile |
|---|---|---|---|---|
| Daily dry sweep | Required | Required | Required | Recommended |
| Damp mop (pH-neutral) | Weekly | Weekly | Weekly | Weekly |
| Steam mop | Never | Avoid | Never | Safe |
| Diluted vinegar solution | Occasional | Avoid | Avoid | Safe |
| Bleach solution | Never | Never | Never | Occasional |
| Wax or polish refresh | 2–4x per year | 1–2x per year | Not needed | Not needed |
One thing linoleum requires that most other hard floors don't is periodic waxing or polishing. That topcoat protects the linseed oil base from oxidizing and keeps the floor resistant to staining and scuffing. Skipping it for too long is one of the primary reasons linoleum floors turn yellow — not the cleaning itself, but the absence of protective finish between cleans.
Both options work — but they work best in different situations. The choice isn't really about cost. It's about matching the solution to the job in front of you.
A simple homemade linoleum cleaner — one part white vinegar to three parts warm water with a few drops of dish soap — handles everyday grime effectively, leaves no residue when rinsed, and costs almost nothing. Avoid going heavier on the vinegar: while diluted acid is safe for occasional use, frequent high-acid cleaning degrades the surface finish over months. If you find yourself relying on aggressive DIY formulas regularly, that's a sign something else in your routine is off — usually insufficient rinsing after mopping. Our guide on homemade carpet cleaning solutions for Bissell machines covers how the same DIY principles apply across different surfaces and cleaning tools.
Commercial cleaners formulated specifically for linoleum or resilient flooring — products like Armstrong Floor Cleaner or Bona Hard Floor Cleaner — are the more reliable choice for deep cleaning and post-wax maintenance. They're pH-balanced, designed to leave no buildup, and formulated to preserve the protective finish rather than break it down. Avoid general multi-surface cleaners that aren't labeled for linoleum — they often contain wax emulsifiers or solvents that react poorly with the natural composition of the floor. The label matters more than the brand name.
Most linoleum damage isn't dramatic or sudden. It accumulates from small, repeated mistakes that seem harmless until the floor is visibly worn, permanently yellowed, or structurally compromised at the seams.
Using a soaking-wet mop is probably the most common mistake people make on linoleum — and it causes the most long-term damage. Excess water works its way into seams and the jute backing, causing edges to lift and the material to bubble or warp over time. The mop should be wrung out so thoroughly it feels almost dry to the touch. If you're coming from tile or luxury vinyl where a wetter mop is fine, this is the single most important habit adjustment to make. It feels excessive at first. It isn't.
Bleach, ammonia, and highly alkaline cleaners strip the protective finish and cause irreversible yellowing. Pine-Sol and similar pine oil products leave a residue that builds up and dulls the surface. Many "all-purpose" floor cleaners designed for vinyl or tile contain ingredients incompatible with linoleum chemistry. If a product isn't specifically labeled for linoleum or resilient flooring, assume it's unsafe until confirmed otherwise. If you're navigating a home with several different floor materials and trying to simplify your cleaning kit, our guide on carpet vs. laminate in the bedroom walks through how different flooring materials drive different maintenance decisions across the whole house.
 |
 |
 |
 |

About Liz Gonzales
Liz Gonzales grew up surrounded by art and design in a New York suburb, with both parents teaching studio arts at the State University of New York. That environment sharpened her eye for aesthetics and spatial detail — skills she now applies to evaluating home products where form and function both matter. She has spent the past several years writing about lighting, home decor accessories, and outdoor living gear, with a particular focus on how products perform in real residential settings rather than showrooms. At Linea, she covers lighting fixtures and bulb reviews, outdoor and patio gear, and general home product comparisons.
You can Get FREE Gifts. Furthermore, Free Items here. Disable Ad Blocker to receive them all.
Once done, hit anything below
|
|
|
|