
To test a fuse with a multimeter, set your meter to continuity mode, touch one probe to each terminal of the fuse, and listen for a beep or watch for a near-zero resistance reading. A good fuse passes current; a blown fuse blocks it. That is the core of how to test a fuse with multimeter — and it takes under two minutes once you know the steps. This guide from the Linea electrical guide covers everything from choosing the right multimeter setting to diagnosing tricky fuses in appliances, cars, and home panels.
Fuses are the silent guardians of every circuit in your home and vehicle. When a fuse blows, your appliance goes dead, your car's power windows freeze, or a circuit breaker refuses to reset. The problem is that a blown fuse looks almost identical to a working one. You need a multimeter to know for certain. Testing takes less time than hunting down a spare fuse, and it saves you from replacing components that are perfectly fine.
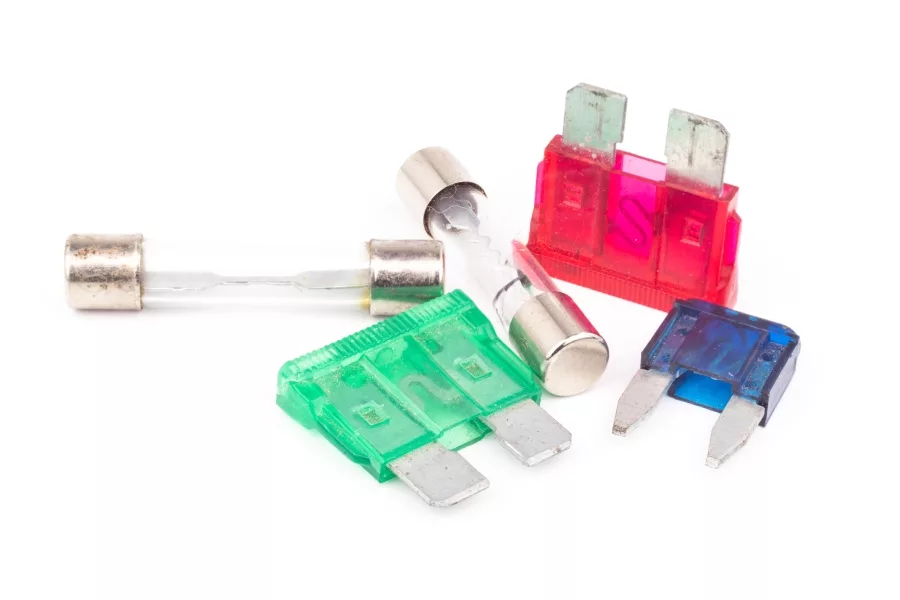
Whether you're dealing with a glass tube fuse in an older appliance, a blade-type automotive fuse, or a ceramic fuse in a breaker panel, the testing process is the same in principle — though the setup details differ. If your appliance has an internal thermal cutoff, you may also want to read about how to test a thermal fuse, since those fail differently and require a separate diagnostic approach.
Contents
Not all multimeters are built the same, and the one you choose directly affects how easy your fuse test will be. Here is a quick breakdown of the main types so you can pick the right tool before you start.
Analog meters use a needle on a scale. Digital meters display a number on an LCD screen. For fuse testing, digital multimeters (DMMs) are the clear winner — they are easier to read, more accurate, and almost always include a dedicated continuity mode with an audible beep.
| Type | Display | Continuity Beep | Best For | Typical Price |
|---|---|---|---|---|
| Analog | Needle/scale | No | Hobbyists, basic voltage checks | $10–$30 |
| Digital (manual range) | LCD number | Yes (most models) | General home and auto use | $20–$60 |
| Digital (auto-ranging) | LCD number | Yes | Beginners, faster testing | $40–$120 |
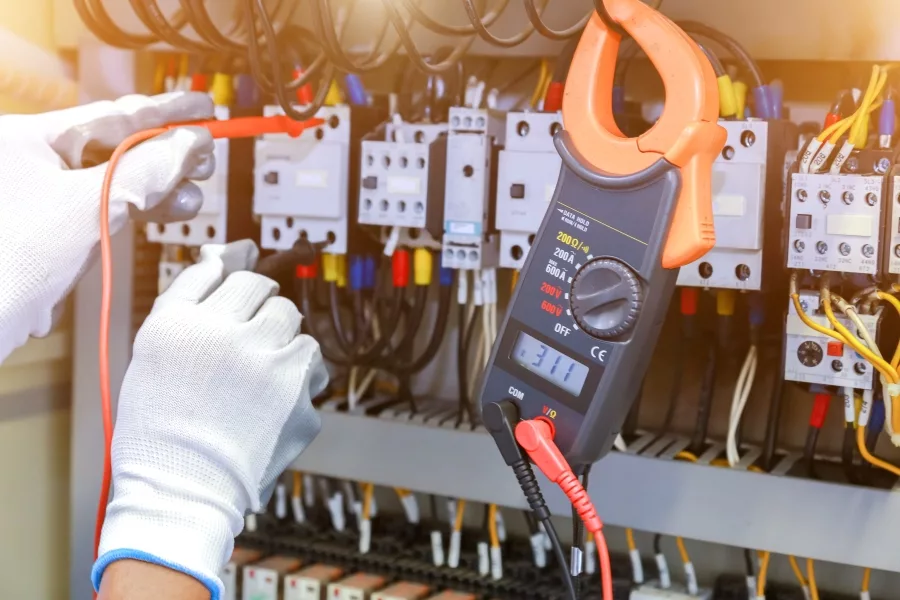
| Clamp meter | LCD number | Yes (most models) | Live current measurement | $30–$150 |
| True RMS digital | LCD number | Yes | Precision AC/DC measurement | $60–$200+ |
For basic fuse testing at home, a standard digital multimeter in the $20–$50 range is more than enough. Auto-ranging models are worth the extra cost if you test fuses across multiple voltage systems — they set the range automatically so you don't have to guess. Clamp meters are overkill for simple fuse checks but useful if you also diagnose live circuits regularly.
Testing a fuse yourself is straightforward — but it isn't always the right call. Know the advantages and the real limitations before you open up your breaker box or appliance.

The financial case for testing fuses yourself is strong. Here's what you're actually spending — and what you're avoiding.
A good entry-level multimeter is a one-time purchase that pays for itself the first time you use it. You don't need a $200 Fluke to test a fuse in a vacuum cleaner or a ceiling fan.
The takeaway: testing the fuse yourself costs you five minutes and zero dollars. Replacing a blown fuse costs a few dollars. Calling a professional to do it costs 10 to 50 times more. The multimeter investment is worth it on day one.
This is the core section. Follow these steps in order. The process covers the three main testing methods — continuity, resistance, and in-circuit voltage — so you can choose the right one for your situation when you need to test a fuse with a multimeter.
Before you touch any fuse, complete these safety steps:
According to Wikipedia's overview of electrical fuses, fuses are rated by both current and voltage — matching the replacement fuse to both ratings is critical for safe operation.
This is the fastest method. Use it when the fuse is removed from the circuit.
Always test your multimeter probes against each other before testing the fuse — touching the two probes together should give you a beep and a zero reading, confirming the meter itself is working correctly.
Use this method if your multimeter has no continuity mode.
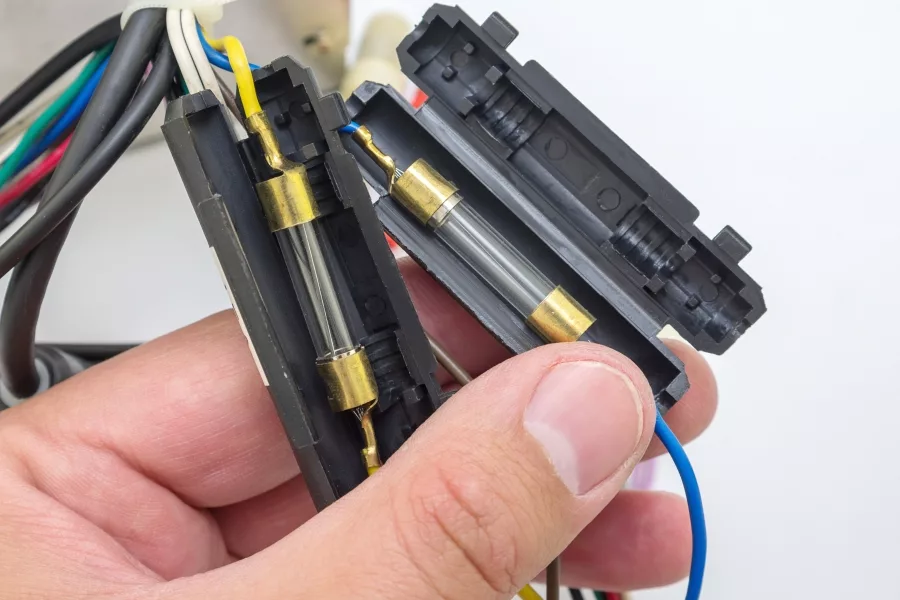
Use this when you cannot safely remove the fuse — for example, in a car's fuse box with the engine off but circuit live, or when testing a fuse holder for voltage presence.
Knowing when to handle electrical issues yourself versus when to step back is a skill that protects both you and your home. The line isn't as blurry as you might think.
Replacing a fuse with a higher amperage rating than the circuit requires is one of the most dangerous DIY mistakes homeowners make. The fuse is designed to sacrifice itself to protect the wiring. Installing a 30A fuse on a 15A circuit means the wiring overheats and potentially catches fire before the fuse blows.
There's a lot of misinformation floating around about fuses. These are the most common myths — and the reality behind each one.
Yes — use the in-circuit voltage test method. Set your multimeter to the appropriate AC or DC voltage range, touch the black probe to ground, and measure voltage on both the input and output terminals of the fuse. If voltage is present on the input but not the output, the fuse is blown. This is the safest method when removing the fuse would disturb other components or disconnect critical systems.
Continuity mode is the easiest and fastest. It's marked with a sound wave symbol or a diode symbol on your dial. Most digital multimeters beep when continuity is detected, so you don't even need to look at the screen. If your meter lacks continuity mode, use the lowest resistance range (usually 200 ohms) — a good fuse reads close to 0 ohms, and a blown fuse reads OL or open loop.
OL stands for "overload" or "open loop" — it means the meter detected no connection between the two probes. When testing a fuse, an OL reading confirms the fuse filament is broken and no current can pass through it. The fuse is blown and needs to be replaced. This is a definitive result, not an ambiguous one.
Check the original fuse first — the amperage rating is printed or stamped on the fuse body or end cap. If the original is too damaged to read, check the fuse box cover, the appliance manual, or the circuit diagram printed inside the appliance housing. Never guess. Using an incorrect amperage fuse — especially a higher one — removes the circuit's protection and creates a fire hazard.
Rarely, but yes. Some fuses — particularly slow-blow types — can develop intermittent internal connections that pass a static continuity test but fail under load. If your appliance cuts out under use but works again after cooling, and the fuse tests fine, suspect a thermal fuse or an intermittent internal connection. In that case, check out the guide on how to test a thermal fuse for the next diagnostic step.
Yes, as long as you follow basic safety protocol. Always power off and unplug the device before removing the fuse. Use a multimeter rated for the voltage level you're working near. Avoid testing fuses in main electrical panels unless you're a licensed electrician — those involve lethal service voltages. For standard household appliances, automotive systems, and low-voltage electronics, testing a fuse with a multimeter is a routine and safe procedure.
 |
 |
 |
 |

About Liz Gonzales
Liz Gonzales grew up surrounded by art and design in a New York suburb, with both parents teaching studio arts at the State University of New York. That environment sharpened her eye for aesthetics and spatial detail — skills she now applies to evaluating home products where form and function both matter. She has spent the past several years writing about lighting, home decor accessories, and outdoor living gear, with a particular focus on how products perform in real residential settings rather than showrooms. At Linea, she covers lighting fixtures and bulb reviews, outdoor and patio gear, and general home product comparisons.
You can Get FREE Gifts. Furthermore, Free Items here. Disable Ad Blocker to receive them all.
Once done, hit anything below
|
|
|
|