
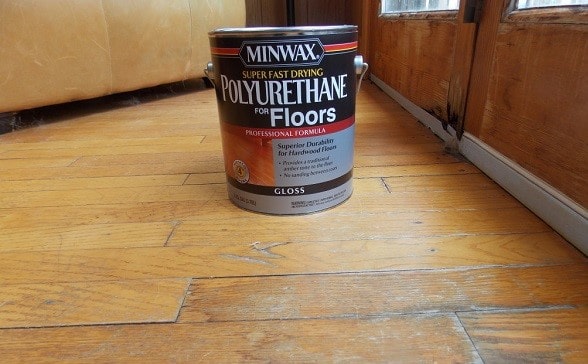
Polyurethane protects more hardwood floors in American homes than any other finish — industry estimates consistently place the figure above 90% of all professionally coated wood surfaces. If you're ready to learn how to apply polyurethane to floors the right way, you need more than a brush and a can of product. You need to understand the prep sequence, the coat-by-coat discipline, and the specific mistakes that turn a $200 DIY project into a floor-stripping nightmare. As part of your overall approach to home cleaning and surface care, this is one skill that pays compounding dividends every year.
The difference between a glass-smooth, durable result and a peeling, bubbled mess almost always traces back to application decisions — not the product. Most brands sell solid polyurethane. Most failures come from the person holding the applicator. Coat thickness, dry time, between-coat sanding: these are the variables you actually control, and they matter far more than which brand is on the label.
Before you open the first can, understand what you're working with. Polyurethane is a polymer formed through a chemical reaction between a polyol and a diisocyanate — it cures into an exceptionally hard plastic film over wood fibers. That hardness is precisely why it outperforms wax, shellac, and penetrating oil finishes on any floor that sees real daily use.
Contents
Choosing between water-based and oil-based polyurethane is the first real decision you'll make — and it shapes everything from your application method to the final color of your floor. Water-based formulas dry faster, emit fewer VOCs, and stay optically clear over time. Oil-based products take longer to cure but build a thicker film per coat and add a warm amber tone that many homeowners find more attractive on traditional hardwoods like oak and cherry.
The practical tradeoff is time. An oil-based finish typically needs eight to twenty-four hours between coats and forty-eight to seventy-two hours before light foot traffic returns. Water-based formulas often allow recoating in two to four hours, which means a three-coat job can be completed in a single long day. If you're working around a household schedule, that difference is enormous.
| Feature | Water-Based | Oil-Based |
|---|---|---|
| Dry time between coats | 2–4 hours | 8–24 hours |
| Full cure time | 7–14 days | 21–30 days |
| VOC level | Low | High |
| Color over time | Stays clear | Ambering/yellowing |
| Film thickness per coat | Thinner | Thicker |
| Cleanup | Soap and water | Mineral spirits |
| Cost per coat | Moderate–high | Moderate |
Both formula types come in matte, satin, semi-gloss, and high-gloss sheens. Satin is the most forgiving in real-world conditions — it hides fine scratches and dust far better than gloss ever will. High-gloss looks stunning the day it's applied and shows every scuff and footprint by the second morning. For a hardwood floor you plan to live on and maintain long-term, satin or semi-gloss delivers a consistently better daily experience.
Solid and engineered hardwood floors are the primary candidates. Oak, maple, ash, cherry, and walnut all accept polyurethane finishes exceptionally well. If your floor was previously coated with another polyurethane product and shows only surface wear rather than deep gouges, a screen-and-recoat — applying a fresh top coat over a lightly abraded surface — is often all you need. You don't always have to sand down to bare wood to get a dramatically improved result.
Avoid applying polyurethane over any floor treated with wax or penetrating oil finishes. Polyurethane does not bond properly to those surfaces and will peel within weeks. If you're unsure what's already on your floor, drop a small amount of water on the surface: if it beads, a film finish is present; if it absorbs quickly, the wood is bare or very worn. Also skip polyurethane on cork, click-lock bamboo (which expands and contracts in ways that fracture rigid film coatings), and any product rated explicitly for a different finish system. Checking your floor type and manufacturer specs before purchasing anything — especially if you're considering options from the leading laminate and hardwood flooring brands — saves expensive backtracking.
Applying a fresh finish to an old floor means sanding first. Start with 36-grit or 40-grit paper on a drum sander for the main field, then move to an orbital edge sander along baseboards and into corners. Progress through 60-grit, then 80-grit, and finish with 100-grit. Never skip grits — jumping from 40 to 100 leaves deep scratch marks that polyurethane amplifies rather than conceals. Always sand with the grain. Diagonal or cross-grain passes leave visible swirl scratches in the final finish, and there is no fixing them without going back to bare wood.
After sanding, vacuum the entire floor thoroughly — multiple passes. Then wipe the surface with a tack cloth to capture any remaining fine dust. Any particle left behind becomes a permanent inclusion in your finish, visible at the right angle for the life of the floor. The same discipline that applies when you're doing routine work to clean and maintain hardwood floors applies here in an even higher-stakes version: the surface condition going in determines everything coming out.
Pro tip: After your final vacuum, let dust settle for at least thirty minutes, then make one last pass with a tack cloth immediately before applying your first coat — not hours earlier when dust has had time to resettle.
Remove all furniture. Tape off the base of door frames and any transitions to other flooring. Turn off your HVAC system and close windows to prevent airborne dust from landing on wet polyurethane — a single pass of the system fan can contaminate an entire room's wet coat. Temperature matters: most formulas perform best between 60°F and 77°F with relative humidity under 70%. Apply outside those parameters and you risk adhesion failure, dramatically extended dry times, or fish-eye defects in the cured film.
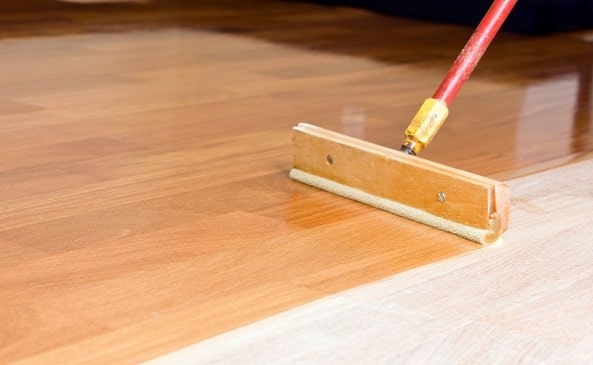
For water-based polyurethane, use a synthetic-bristle brush for edges and a foam or microfiber roller for the main field. Oil-based products work best with a natural-bristle brush or a lambswool pad on a long pole. Foam rollers introduce microbubbles into oil-based finishes — a mistake that's nearly impossible to correct after the coat skins over. Match your applicator to your formula, not your convenience.
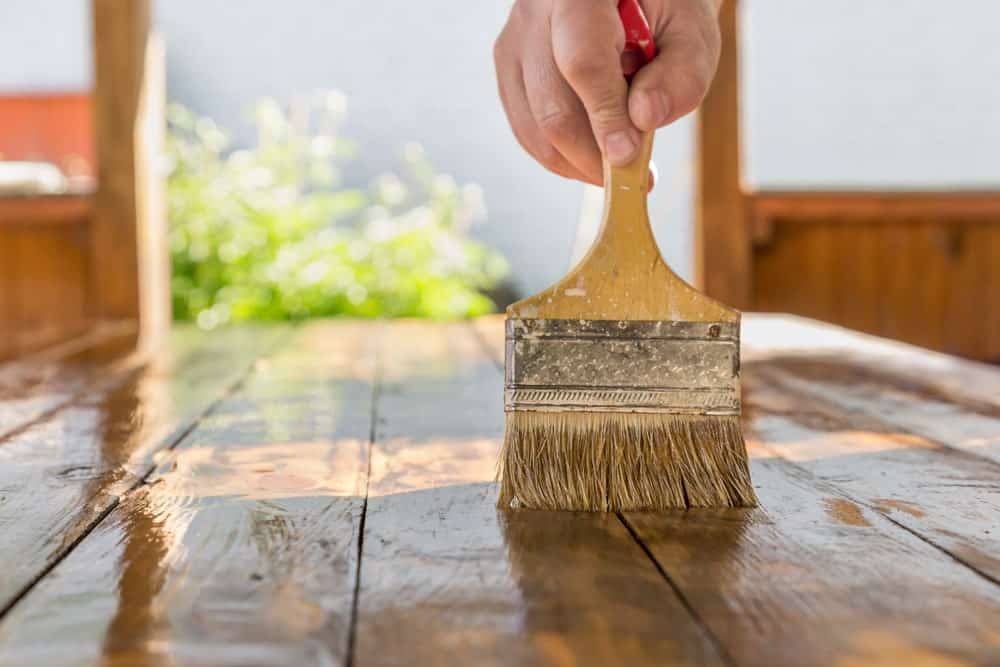
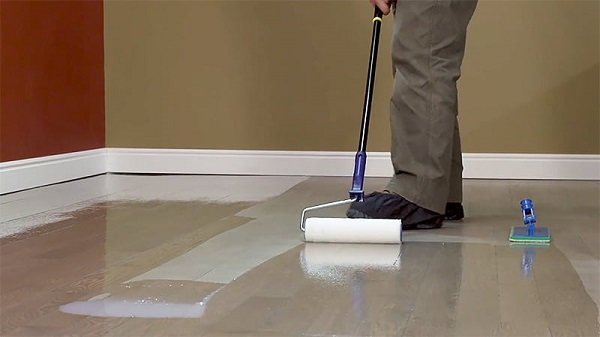
Start in the corner farthest from the door and work toward your exit — you should never have to step on wet finish to leave the room. Apply the first coat thin. Thinner than you think it needs to be. A thick first coat traps solvent beneath the surface skin, which causes wrinkling, soft spots, and adhesion problems for every coat that follows. Brush the edges and perimeter first, then roll the field, maintaining a wet edge at all times to prevent lap marks. Work in manageable 3- to 4-foot sections. Don't go back over any area that has begun to tack; dragging a brush through tacky finish creates ridges that harden permanently.
Once the first coat is fully dry, sand the entire surface with 220-grit screen or paper. You're not removing material — you're creating mechanical adhesion for the next coat and knocking down any raised grain or dust nibs. Vacuum again. Tack cloth again. Apply the second coat using the same wet-edge technique. Most floors need three coats for genuinely durable protection; high-traffic areas like entryways and hallways benefit from a fourth.
Many professional floor finishers thin the first coat of oil-based polyurethane by 10% with mineral spirits. This improves penetration into bare wood fibers and creates a stronger mechanical bond for subsequent coats. Water-based products generally should not be thinned unless the manufacturer explicitly permits it — adding water changes the film-forming chemistry in ways that measurably reduce long-term durability. Read the technical data sheet, not just the back label.
Bubbles in a cured finish trace back to one of three causes: aggressive brushing that whips air into the product, applying over a surface that's too warm, or using the wrong applicator for the formula. Never shake polyurethane — stir it slowly and let it rest for five minutes before application. If you see bubbles in a wet coat, lightly drag a dry brush across the surface immediately. Most will pop and self-level before the film skins over. Brush marks are typically a sign of applying too thick or working in sections that are too large; the product skins at the edges before you complete the fill.
Red oak is the most common hardwood floor in residential construction, and it's one of the most forgiving to finish. Its open grain accepts the first coat readily and shows excellent film build with subsequent layers. Maple is denser and harder — its tight, closed grain can cause the first coat to bead rather than penetrate. A thinned sealer coat or a dedicated wood conditioner applied before the first polyurethane coat solves this on maple and prevents the blotchy, uneven appearance that catches many first-timers off guard.
Engineered floors have a wear layer typically ranging from 2mm to 6mm. You can sand and refinish engineered hardwood only if the wear layer measures at least 3mm thick — any thinner and you risk cutting through to the substrate. Measure before committing to a full sand. If the wear layer is marginal, a screen-and-recoat without full sanding is the safer call. It delivers significantly improved appearance with far less risk of destroying the floor entirely.
If your finish peels in sheets, the cause is almost always a contaminated surface: wax, silicone from furniture polish, residual oil finish, or a previous coating that wasn't fully removed. There is no patch that reliably bonds to a delaminating film. The fix requires stripping back to bare wood and starting the entire process over. This outcome is exactly why prep work justifies every hour you spend on it before the first coat ever touches the floor.
Fish-eye defects — small circular craters scattered across the wet film — indicate silicone contamination. A single drop of silicone-based furniture polish anywhere on the floor can cause dozens of fish-eyes across the entire room, because silicone spreads aggressively during application. The standard correction is to add a fish-eye eliminator additive to the current coat, allow it to dry fully, sand, and recoat. Prevent it entirely by banning silicone-based products from any room where you plan to apply polyurethane — ever.
Blotchiness in the final sheen almost always means between-coat sanding was inconsistent — some areas were cut through to bare wood while adjacent sections retained their film. The correction is another thin coat applied evenly, followed by careful, uniform sanding before the final layer. If blotchiness appears only at certain light angles but looks uniform under direct light, it may be natural variation in the wood grain rather than an application defect. Learn to distinguish the two before reaching for more sandpaper.

Most hardwood floors require three coats for adequate protection — a sealer or first coat, an intermediate coat, and a final finish coat. High-traffic areas such as hallways, entryways, and kitchens benefit from a fourth coat. Never apply fewer than two coats on any floor that will see regular use.
Yes. Light sanding with 220-grit screen or sandpaper between every coat is essential. You're not removing material — you're creating mechanical adhesion for the next layer and eliminating dust nibs or raised grain that would show through the finished surface. Skip this step and the coats bond weakly to each other.
Water-based polyurethane typically allows light foot traffic after 24 hours, though full cure takes 7 to 14 days. Oil-based formulas need 48 to 72 hours before light foot traffic and 21 to 30 days for full hardness. Avoid placing rugs or furniture until the finish has fully cured.
Yes, but only if the existing finish is in sound condition with no peeling or delamination. Lightly abrade the surface with a 220-grit screen to create mechanical adhesion, clean thoroughly, and apply your new coat. This process — called a screen-and-recoat — refreshes the finish without requiring full sanding down to bare wood.
For water-based polyurethane, a synthetic-bristle brush for edges and a microfiber roller for the main field give the best results. For oil-based products, use a natural-bristle brush or a lambswool applicator pad on a long handle. Foam rollers create microbubbles in oil-based formulas and should be avoided with those products.
A cloudy or milky appearance in a cured water-based finish is almost always caused by applying in conditions that are too cold, too humid, or both. The formula traps moisture as it dries, which scatters light and creates a hazy look. Sand back the affected coat and reapply in proper temperature and humidity conditions — between 60°F and 77°F with relative humidity under 70%.
A flawless polyurethane finish is never about the product — it's about the preparation you did before the first drop hit the wood.
 |
 |
 |
 |

About Linea Lorenzo
Linea Lorenzo has spent over a decade testing home gadgets, cleaning products, and consumer electronics from his base in Sacramento, California. What started as a personal obsession with keeping his space clean and stocked with the right tools evolved into a full-time writing career covering the home products space. He has hands-on experience with hundreds of cleaning solutions, robotic and cordless vacuums, and everyday household gadgets — evaluating them for performance, value, and real-world usability rather than spec sheet appeal. At Linea, he covers home cleaning guides, general how-to tutorials, and practical product advice for everyday home care.
You can Get FREE Gifts. Furthermore, Free Items here. Disable Ad Blocker to receive them all.
Once done, hit anything below
|
|
|
|