
According to remodeling industry surveys, small bathrooms — typically under 50 square feet — are the most frequently renovated rooms in American homes, yet the floor remains the most underestimated element in the entire project. Selecting the right small bathroom flooring ideas can visually expand a tight space, prevent costly moisture damage, and completely reframe how a room feels on a daily basis. Our team has spent considerable time researching materials, patterns, and installation methods designed specifically for compact spaces, and the options available today are far more practical and affordable than most homeowners expect. For a broader look at home maintenance and cleaning products, our cleaning section covers related household topics worth exploring alongside any bathroom project.
The average small bathroom clocks in at 35 to 50 square feet — a footprint where every material and pattern decision gets amplified. A poor material choice leads to warping, staining, or mold within a few years. The wrong tile size makes an already compact room feel like a storage closet. Our experience reviewing home products and flooring solutions has made one thing consistently clear: the floor sets the visual tone for the entire bathroom, often more powerfully than paint or lighting alone.
Whether the goal is a full floor replacement or a fast cosmetic update that avoids major demolition, the path forward depends on understanding which materials last, which installation practices protect against moisture, and which common decisions most people end up regretting. Below, our team walks through each of those areas in practical detail.
Contents
Long-term flooring decisions in a small bathroom come down to three core properties: water resistance, structural durability, and visual impact. Most available materials check one or two of those boxes reliably. Only a handful check all three consistently enough to warrant a long-term investment. Understanding what each material actually delivers — not just at installation, but five and ten years later — is where most planning conversations need to start.
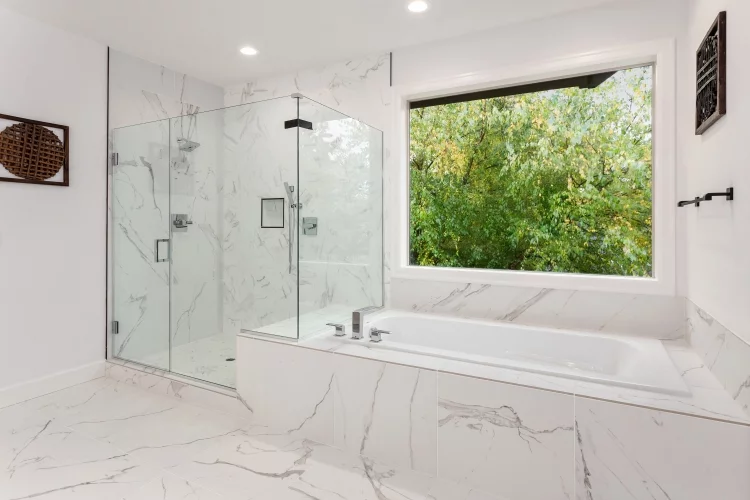
Ceramic and porcelain tile remain the gold standard for bathroom floors, and for good reason. Both are highly water-resistant, easy to maintain with standard cleaning products, and available in hundreds of finishes and sizes. Porcelain, specifically, absorbs less than 0.5% moisture by weight according to industry testing standards — making it the denser, harder, and more moisture-proof choice for high-traffic or chronically wet floors. According to Wikipedia's entry on ceramic tile, the material has been used in construction for thousands of years due to its resilience and adaptability across climates and applications.
Luxury vinyl has emerged as one of the most practical flooring choices for small bathrooms over the past decade. It is fully waterproof through its core — not merely water-resistant at the surface — and it handles standing water without swelling, warping, or delaminating. Our team has evaluated its performance across several home environments, and it consistently holds up well in moisture-heavy areas while remaining comfortable underfoot in a way that hard tile simply cannot match.

For anyone who has already installed luxury vinyl elsewhere in the home, our guide on how to clean vinyl plank flooring walks through proper maintenance in detail — the same principles and product recommendations apply directly to bathroom installations.
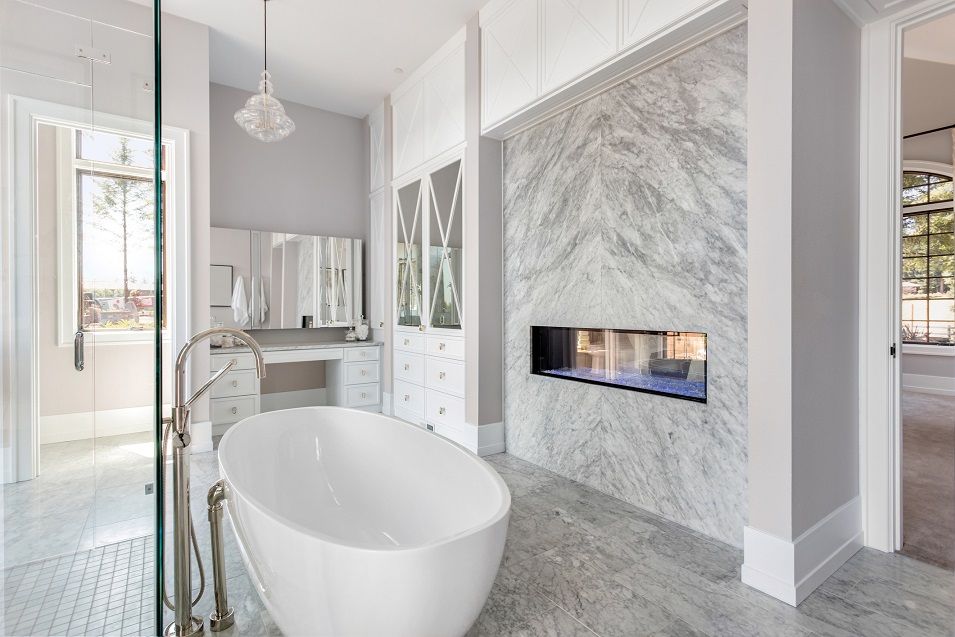
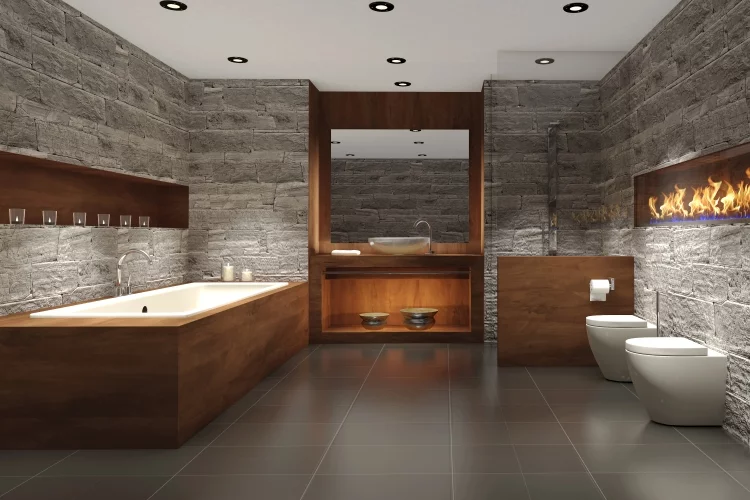
Marble, slate, and travertine add a premium aesthetic to any bathroom, but they carry maintenance requirements that synthetic materials do not. Stone is porous by nature and requires sealing on a regular schedule to resist moisture penetration effectively. The upfront cost is also considerably higher than tile or vinyl, and professional installation is strongly advisable for most stone types.
| Material | Waterproof Rating | Avg. Cost (per sq ft, materials) | Expected Lifespan | DIY Friendly |
|---|---|---|---|---|
| Ceramic Tile | Highly resistant | $1–$5 | 15–20 years | Moderate |
| Porcelain Tile | Highly resistant | $3–$10 | 20–30+ years | Moderate |
| Luxury Vinyl (LVP/LVT) | 100% waterproof core | $2–$7 | 10–20 years | High |
| Natural Stone | Requires sealing | $5–$20+ | 20–50 years | Low |
| Peel-and-Stick Vinyl | Water-resistant (not waterproof) | $0.50–$2 | 3–7 years | Very High |
Even the best flooring material can underperform if installed without attention to the details that govern long-term durability. In small bathrooms especially, installation decisions — grout type, sealing schedule, tile orientation, and pattern choice — have an outsized effect on both the structural integrity of the floor and how the room reads visually to anyone standing in it.
Grout is one of the most common failure points in bathroom floors. Unsealed or cracked grout allows moisture to migrate beneath tiles, causing adhesive failure, mold growth, and eventually subfloor damage that costs far more to repair than a simple resealing appointment. Our team consistently recommends epoxy grout for bathroom floor applications — it is non-porous and eliminates the recurring sealing obligation that cement-based grout demands.
Pro tip: Matching grout color closely to tile color makes grout lines nearly invisible — a straightforward technique that makes small bathroom floors feel more seamless and continuous without changing a single tile.
Tile orientation affects perceived room size more than most people expect. Installing rectangular tiles diagonally or running them lengthwise along the room's longest wall adds visual depth to a tight footprint in a way that changing the tile material entirely often cannot match. Our team has observed this effect repeatedly across different bathroom configurations — it's a design lever that costs nothing extra and delivers consistent results.
Not every small bathroom flooring project requires tearing out existing material. Several approaches deliver meaningful visual and functional improvements without the disruption or expense of a full replacement. These options are worth evaluating carefully before committing to a larger project — especially when the existing floor is structurally sound but aesthetically dated.
Modern peel-and-stick vinyl tiles have improved substantially in quality and realism. Today's versions convincingly mimic ceramic, stone, and wood patterns, and many homeowners use them as a practical medium-term solution during phased renovations or as a long-term budget fix in lower-traffic bathrooms. The installation process requires no adhesive, grout, or specialized tools — surface preparation is genuinely the most demanding part of the job.
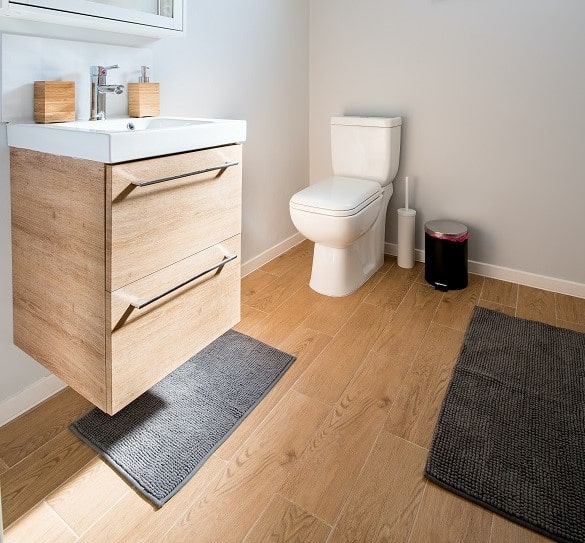
For bathrooms where replacing the floor is not the immediate priority, a well-chosen bath mat can meaningfully reframe the visual character of the space. High-quality woven, memory foam, or natural fiber mats add texture, warmth, and color contrast while protecting the existing floor from daily moisture exposure and wear.
Incorporating floor care into a consistent seasonal cleaning routine keeps any bathroom looking fresh over time. Our spring cleaning tips include bathroom-specific steps that address grout scrubbing, mat washing, and surface maintenance in a single organized pass.
One of the most consequential decisions in any bathroom flooring project is whether to handle installation personally or hire a contractor. The right answer depends heavily on the material selected, the current condition of the subfloor, and the complexity of the layout — particularly around fixtures, curved walls, or doorways that require careful cuts.
Several flooring types are genuinely accessible to motivated beginners. Luxury vinyl click-lock, peel-and-stick tile, and basic ceramic tile on a well-prepared, level subfloor are all within reach for most home improvement enthusiasts willing to invest time in proper surface preparation and careful layout planning.
Natural stone, radiant floor heating systems, and any project that uncovers subfloor damage typically call for professional expertise. A qualified contractor can assess whether the subfloor needs leveling, reinforcement, or full replacement — a structural issue that dramatically affects tile longevity if left unresolved.
Our team has reviewed enough bathroom renovation outcomes to recognize the patterns that consistently lead to problems. Nearly all of the most common flooring mistakes fall into predictable categories — and nearly all of them are avoidable with deliberate planning and the right material choices before any work begins.
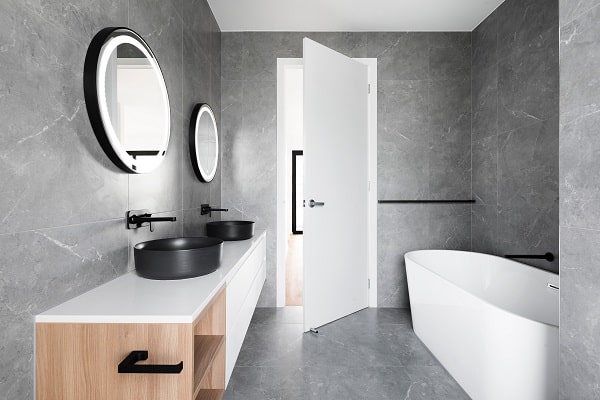
Small tiles in a small bathroom multiply grout lines and create visual clutter that makes a compact space feel even more confined. Large-format tiles reduce visible seams and let the floor read as a single continuous surface. Most designers recommend tiles no smaller than 12×12 inches for bathroom floors under 50 square feet — a guideline our team has consistently found to hold up in practice.
Moisture is the single biggest threat to any bathroom floor — not just at the surface level, but in the layers underneath it. Water that penetrates grout lines or seams around fixtures eventually reaches the subfloor, where it causes rot, mold colonization, and structural damage that can cost thousands to repair. Skipping a waterproofing membrane or failing to caulk fixture edges is a common shortcut with predictably expensive consequences.
Porcelain tile is generally considered the most durable choice for bathroom floors. It absorbs minimal moisture, resists staining and scratching, and can last 30 years or more with proper installation and maintenance. Natural stone offers comparable longevity but requires more consistent sealing and upkeep to perform at that level.
Yes. Modern luxury vinyl plank and tile products are 100% waterproof through their core construction, making them a reliable and practical choice for bathroom floors. The critical step is ensuring that edges and seams around fixtures and walls are properly sealed to prevent water from migrating beneath the surface to the subfloor.
Our team generally recommends tiles in the 12"×12" to 24"×24" range for small bathroom floors. Larger-format tiles reduce visible grout lines and create a more continuous, expansive-feeling surface. Very small mosaic tiles can introduce visual busyness and make already-tight spaces feel more cluttered rather than open.
Cement-based grout in wet areas should be sealed every 12 to 18 months. Epoxy grout is non-porous by nature and does not require periodic sealing. A straightforward water-drop test determines whether existing grout still holds its seal — if water absorbs into the surface rather than beading up, resealing is overdue.
In most cases, yes — provided the existing tile surface is clean, structurally sound, and reasonably flat. Cracked, loose, or heavily textured tiles make poor candidates for peel-and-stick application. Proper surface cleaning and the use of a bonding primer improve adhesion and meaningfully extend the lifespan of the new tiles.
Luxury vinyl click-lock planks or tiles are widely considered the most accessible full-floor replacement option for DIYers. They require minimal tools, no adhesive or grout, and can typically be installed across a small bathroom floor in a single afternoon. Peel-and-stick tile is even simpler in process but offers less durability and water resistance over the long term.
Several techniques help make a small bathroom floor feel larger than it is. Installing rectangular tiles diagonally or running them along the room's longest wall creates visual depth. Using large-format tiles with minimal grout lines reduces surface interruption. Choosing light, neutral-toned flooring reflects available light and opens the space. Our team has found that tile direction and grout color often deliver more visual impact than switching materials entirely.
The floor of a small bathroom does more work than any other surface in the room — choosing it well is less about aesthetics than about understanding water, proportion, and longevity before the first tile is ever laid.
 |
 |
 |
 |

About Linea Lorenzo
Linea Lorenzo has spent over a decade testing home gadgets, cleaning products, and consumer electronics from his base in Sacramento, California. What started as a personal obsession with keeping his space clean and stocked with the right tools evolved into a full-time writing career covering the home products space. He has hands-on experience with hundreds of cleaning solutions, robotic and cordless vacuums, and everyday household gadgets — evaluating them for performance, value, and real-world usability rather than spec sheet appeal. At Linea, he covers home cleaning guides, general how-to tutorials, and practical product advice for everyday home care.
You can Get FREE Gifts. Furthermore, Free Items here. Disable Ad Blocker to receive them all.
Once done, hit anything below
|
|
|
|