
After setting up a new dedicated workspace in the basement, the first realization arrived quickly: a single 15-amp circuit shared with the laundry appliances was nowhere near sufficient to power a table saw, a dust collector, and proper overhead lighting at the same time. That scenario is far more common than most shop owners anticipate, and it illustrates precisely why learning how to wire a workshop correctly is one of the highest-value projects you can undertake. This guide, developed for the workshop electrical wiring category, walks you through every critical phase of the process — from initial load calculations to the final inspection — so your shop runs safely and efficiently for the long term.
A properly wired workshop delivers far more than a reliable power supply. It protects expensive equipment from voltage fluctuations, reduces the risk of electrical fires, and ensures that every tool operates at its rated performance level. The difference between a well-planned electrical system and a haphazard one becomes apparent the moment you run a high-draw tool and watch every light in the shop dim simultaneously — a clear sign that circuits are dangerously overloaded and headed toward failure.
Before purchasing a single wire or conduit fitting, you need a thorough understanding of your load requirements, applicable electrical codes, and the permit process in your municipality. The National Electrical Code (NEC) establishes the baseline for all residential and commercial electrical work across the United States, and your local authority having jurisdiction may impose additional requirements above that standard. Consulting that authority before breaking ground is not a formality — it is the professional standard that separates safe, code-compliant installations from costly, liability-laden ones.
Contents
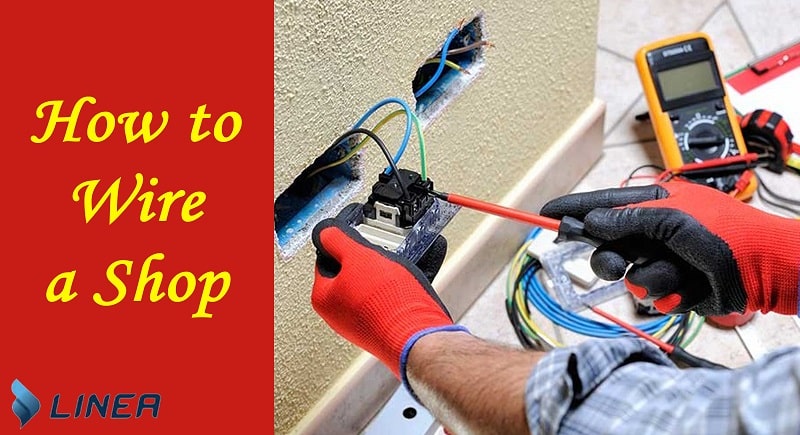
Attempting to wire a workshop without the correct tools is one of the most common and costly mistakes a shop owner can make. Proper instruments not only make the work faster and more precise, but they also ensure that every connection meets safety requirements and passes inspection. Before you begin any physical work, assemble every tool and material the project demands so that progress proceeds without dangerous improvisation.
The foundational toolkit for any workshop wiring project combines mechanical hand tools with electronic diagnostic instruments, each serving a specific and non-substitutable purpose in the installation process.
Selecting the correct wire gauge for each circuit is non-negotiable. Undersized wire overheats under sustained load, and overheated wire insulation is the primary cause of electrical fires in workshop environments. The NEC specifies minimum wire sizes for every amperage rating, and you must comply with or exceed those minimums at every circuit in your shop.
Sound planning is the single most decisive factor in a successful workshop wiring project. Rushing through the planning phase to reach the physical installation is the primary reason shop owners end up with undersized panels, misplaced outlets, and circuits that trip constantly under normal operating conditions. Investing adequate time in a thorough layout plan before touching a single wire saves significant money and frustration over the lifespan of your shop.
Begin by listing every tool and appliance you intend to operate in the workshop, recording the amperage draw of each item from its nameplate or owner's manual. Add those loads together, then apply a 20 percent safety margin above that total to determine the minimum panel capacity your shop requires. A 100-amp subpanel is adequate for most hobbyist shops, while serious production environments frequently require 200 amps or more to operate multiple high-draw tools simultaneously. If you anticipate expanding your tool collection in the future, design the panel for that expanded capacity now — retrofitting an undersized panel after walls are closed is always significantly more expensive than installing the correct size at the outset.
Dedicated circuits for high-draw tools prevent nuisance tripping and protect sensitive equipment from the voltage sags caused by motor startup inrush current. Assign separate circuits to your table saw, dust collector, air compressor, and any welding station before planning the general-purpose receptacle circuits. Lighting must run on its own dedicated circuit so that a tripped breaker at a tool outlet does not plunge the shop into darkness during an operation. If you plan to add motion-activated lighting to your shop, reviewing the process for wiring a motion sensor to multiple lights before finalizing your lighting circuit layout will inform both your switching strategy and your conduit routing decisions.
The cost of wiring a workshop varies significantly based on the size of the space, the complexity of the electrical system, local labor rates, and how much of the work you perform yourself. Understanding the typical cost ranges for each component of the project allows you to budget realistically and make informed decisions about where to allocate your resources for the greatest return.
Materials typically represent 40 to 60 percent of the total project cost for a workshop wiring installation. The table below provides realistic estimates for the most common components, based on current market pricing for residential-grade and commercial-grade electrical materials widely available at electrical supply houses and home improvement retailers.
| Component | Typical Cost Range | Notes |
|---|---|---|
| 100-amp subpanel (with breakers) | $150 – $350 | Size up to 200-amp for larger production shops |
| 12 AWG wire (250 ft roll) | $80 – $130 | Purchase extra; returns are generally accepted |
| EMT conduit (per 10 ft section) | $6 – $14 | Required for all exposed runs in garages |
| 20-amp duplex receptacles (per unit) | $4 – $12 | Use industrial-grade in heavy-use shop environments |
| 240-volt outlet and dedicated breaker | $30 – $80 | NEMA 6-20 or 6-30 for most stationary tools |
| GFCI receptacles (per unit) | $15 – $35 | Required in garages and unfinished basements |
| Electrical permit | $50 – $250 | Fee varies widely by municipality |
If you hire a licensed electrician to perform all or part of the installation, expect labor rates between $75 and $150 per hour depending on your region and the prevailing wage in your market. A complete workshop wiring installation in a two-car garage typically requires 16 to 30 hours of professional labor, placing the total labor cost between $1,200 and $4,500 before materials. Permits are mandatory in virtually every jurisdiction and are designed to ensure that a qualified inspector verifies your work meets code. If you are also exploring energy storage options for battery backup or off-grid capability in your shop, the guide on how to store electrical energy provides useful context for integrating storage systems into your overall electrical plan.
Not every workshop demands the same electrical architecture. The configuration you choose depends on the types of tools you operate, the volume of work you produce, and the power supply already available at your main service panel. Understanding the most common configurations before you begin allows you to select the one that matches your actual requirements rather than over-building or under-building the system.
Most residential and light-commercial workshops operate on single-phase 120/240-volt power, which is what the utility delivers to a standard residential service entrance. Single-phase power is fully capable of running all consumer-grade and prosumer-grade power tools, including cabinet table saws, band saws, planers, jointers, and large air compressors. Three-phase power is primarily relevant to production environments running industrial motors rated at five horsepower or more, and transitioning to three-phase service requires a dedicated upgrade that the utility company must approve, engineer, and install at your expense.
Several categories of workshop equipment require dedicated 240-volt circuits, and failing to provide them results in either a non-functional tool or a dangerously overloaded 120-volt circuit that poses an immediate fire hazard. Common 240-volt applications in a well-equipped shop include the following:
Understanding how multi-point switching circuits function is also valuable at this stage of planning. If you are wiring multiple stations that need to share control of a single lighting or equipment circuit, the guide on how a 3-way switch works explains the wiring logic clearly and applies directly to workshop scenarios where you need to control a circuit from two separate locations on opposite sides of the shop.
Abstract principles become far more actionable when applied to specific workshop configurations that mirror what most shop owners actually encounter. The two most common workshop environments — the attached or detached garage and the finished or unfinished basement — each present distinct challenges and opportunities that directly influence how you plan and execute the wiring installation from start to finish.
A detached garage workshop requires a dedicated feeder run from the main house panel, typically installed in buried conduit or as an overhead service cable, depending on local code requirements and the distance between structures. For a two-car garage shop, a 100-amp feeder with its own subpanel mounted inside the garage is the standard and most cost-effective approach. The subpanel then distributes power to dedicated circuits for major tools, a general-purpose 20-amp receptacle circuit running along the perimeter walls, and a separate lighting circuit. GFCI protection is required for all garage receptacles under NEC Article 210.8, regardless of proximity to a water source — there are no exceptions for this requirement.
A basement shop benefits from close proximity to the main electrical panel, which reduces feeder costs and simplifies the installation considerably. However, basements frequently present challenges related to dampness and moisture intrusion, which elevate the electrical safety requirements that apply to the entire installation. All basement receptacles must be GFCI-protected, and any wiring installed in an unfinished basement must run through conduit or be secured and protected per NEC specifications for that location type. Ceiling height in an unfinished basement also affects conduit routing and lighting fixture selection, both of which must comply with minimum headroom clearances established by the code.
One of the most consequential decisions you face when planning a workshop wiring project is whether to perform the work yourself, hire a licensed electrician, or pursue a hybrid approach that splits responsibilities intelligently. Each option carries distinct advantages and limitations, and the right choice depends on your existing skill level, the complexity of the specific installation, and the permit requirements enforced in your jurisdiction.
Certain elements of a workshop wiring project should be delegated to a licensed professional without exception. These include the installation or modification of the main service panel, the connection of a new feeder circuit at the utility meter, and any work requiring the utility company to temporarily disconnect power at the meter base. If your project demands a service upgrade from 100 amps to 200 amps at the main panel, that work involves coordination between the utility company, the AHJ, and a licensed contractor — it is not DIY territory under any circumstances. Additionally, if you are unfamiliar with the fundamentals of electrical safety, such as the proper use of a non-contact voltage tester or the critical distinction between grounding and bonding conductors, hiring a professional for the full scope is the responsible and financially sound decision.
If you possess a solid foundational understanding of electrical systems, you can safely perform a substantial portion of the workshop wiring work yourself, subject to permit approval in your jurisdiction. Tasks within the reach of a knowledgeable and careful DIYer include the following:
Always pull the required permits before beginning work and schedule inspections at every stage the AHJ requires. A permitted inspection is an objective verification that your installation is safe — it is not an obstacle to progress but a professional quality checkpoint that protects you, your tools, and your property.
A workshop electrical system that was installed correctly and inspected at commissioning will not maintain itself indefinitely. Thermal cycling from repeated motor starts, vibration transmitted through the shop structure, airborne sawdust accumulation inside electrical boxes, and the general demands of a productive working environment all contribute to wear that must be addressed through periodic, systematic maintenance and inspection.
Establish a regular inspection schedule — at minimum once per year — and walk through the following checklist systematically to identify developing problems before they escalate into safety hazards or equipment failures that interrupt your work.
Circuit breakers in workshop environments are subjected to far more frequent cycling than those in residential living spaces, due to the high inrush current drawn by power tool motors on every startup. A breaker that trips repeatedly under normal operating load is not a nuisance — it is a diagnostic signal that the circuit is overloaded, the breaker has aged beyond its reliable service life, or a tool has developed an internal fault drawing excessive current. Replace any breaker that trips under rated load, feels loose in the bus bar, or fails to reset with a firm, positive click. Never increase the breaker amperage to stop nuisance tripping — doing so eliminates the overcurrent protection the breaker provides and dramatically increases the risk of a wiring fire.
Even a correctly designed and properly installed workshop electrical system will eventually present a problem that requires systematic diagnosis and careful repair. Knowing how to approach these issues methodically allows you to identify the root cause quickly, resolve it without creating additional hazards, and return your shop to full operation with confidence in the fix you have made.
The most frequent complaint in workshop electrical systems is a breaker that trips during normal tool operation. Before replacing the breaker, calculate the actual running load on that circuit by adding the amperage ratings of every device connected to it simultaneously during operation. If the total exceeds 80 percent of the breaker's rated amperage — the NEC's continuous load limit for branch circuits — the circuit is overloaded by design, not by fault, and the correct solution is to redistribute the load across additional circuits or install a dedicated circuit for the high-draw tool. A clamp meter placed around one leg of the circuit wire while the tools run at full load provides the most accurate real-world measurement and eliminates guesswork from the diagnostic process entirely.
A dead outlet in a workshop is not always caused by a tripped breaker at the panel. In GFCI-protected circuits, a tripped GFCI device located upstream of the dead outlet — sometimes positioned in a different area of the shop or even in an adjacent room on the same circuit — will cut power to every downstream receptacle on that branch. Always locate and test every GFCI device associated with the affected circuit before concluding that the outlet itself has failed. If the GFCI resets normally and the outlet remains dead, use a non-contact voltage tester at the outlet box to determine whether voltage is present at the terminals. Voltage present at the box but no output from the receptacle indicates a failed device requiring replacement; no voltage at the box indicates an upstream wiring break that requires tracing the circuit back to its source connection.
Most workshops require a minimum of four to six circuits: one dedicated circuit per major stationary power tool, a general-purpose 20-amp receptacle circuit along the perimeter walls, and a separate lighting circuit. Larger shops with welders, compressors, and multiple simultaneous users may require eight to twelve circuits supported by a 100-amp or 200-amp subpanel.
In virtually every jurisdiction, a permit is required before beginning any new electrical installation, including workshop wiring. Permits ensure that the completed work is inspected by a qualified official who verifies code compliance. Skipping the permit process creates personal liability exposure and creates complications during property sales and insurance claims.
A 100-amp subpanel is sufficient for most hobbyist and small production shops. If you operate multiple 240-volt tools simultaneously, run a welder at full duty cycle, or plan significant future tool additions, a 200-amp subpanel provides the necessary capacity with room to expand without a panel replacement. Always size the panel for your anticipated future needs, not only your current load.
Extension cords are not a substitute for permanent branch circuit wiring and should never be used as a fixed installation. They are designed for temporary use only and pose both fire and shock hazards when subjected to the continuous, high-amperage loads typical of power tool operation. Install permanent receptacle circuits at appropriate intervals around the shop perimeter instead of relying on extension cords.
The correct wire gauge depends on the amperage rating of the circuit. A 20-amp, 240-volt circuit requires 12 AWG wire; a 30-amp circuit requires 10 AWG wire; and a 50-amp circuit for a welder requires 6 AWG wire. Always verify the tool's amperage draw on its nameplate and size both the wire and the breaker to match the circuit's rated amperage, not merely the tool's steady-state running current.
Yes. The NEC requires GFCI protection for all receptacles in garage and unfinished basement locations, which covers the majority of workshop installations. Even in finished basement shops, GFCI protection is strongly advisable given the presence of metal tools, conductive flooring, and the possibility of moisture intrusion, all of which significantly elevate shock risk during normal shop operation.
Calculate the total amperage drawn by your home at peak usage and compare it to your main service panel's rated capacity. If the sum of existing loads plus the proposed workshop feeder exceeds 80 percent of the main panel rating, a service upgrade is required before adding the workshop circuits. A licensed electrician can perform a formal load calculation that provides a definitive answer based on your actual metered consumption data.
In an exposed garage or workshop environment, all wiring must be protected inside conduit — EMT is the preferred choice for its physical durability, inherent grounding capability, and resistance to damage from tools and equipment. Surface-mounted conduit runs secured to studs and joists at the required support intervals provide full conductor protection and satisfy NEC requirements for exposed wiring in non-dwelling occupancies.
A workshop wired with discipline and foresight will serve you without interruption; one wired in haste will announce every shortcut at the worst possible moment.
 |
 |
 |
 |

About Linea Lorenzo
Linea Lorenzo has spent over a decade testing home gadgets, cleaning products, and consumer electronics from his base in Sacramento, California. What started as a personal obsession with keeping his space clean and stocked with the right tools evolved into a full-time writing career covering the home products space. He has hands-on experience with hundreds of cleaning solutions, robotic and cordless vacuums, and everyday household gadgets — evaluating them for performance, value, and real-world usability rather than spec sheet appeal. At Linea, he covers home cleaning guides, general how-to tutorials, and practical product advice for everyday home care.
You can Get FREE Gifts. Furthermore, Free Items here. Disable Ad Blocker to receive them all.
Once done, hit anything below
|
|
|
|