
Nearly 83% of homeowners encounter at least one cracked ceramic tile within the first decade of living in their home, yet most assume the only fix is a full replacement. The truth is that learning how to repair cracked ceramic tiles yourself saves you hundreds of dollars and a weekend of demolition work. Whether you are dealing with a hairline fracture in your bathroom floor or a deep chip on your kitchen backsplash, the repair process is far more approachable than you might expect. Keeping your floors and surfaces in good shape ties directly into overall home cleaning and maintenance, so this skill pays dividends well beyond a single tile.

You do not need specialized contractor training or expensive equipment to handle most ceramic tile cracks at home. A basic repair kit, some patience, and the right technique will get your tile looking close to original in an afternoon. The key is matching your repair method to the type and severity of the crack, because a hairline fracture calls for a completely different approach than a tile that has split into multiple pieces.
In this guide, you will walk through everything from diagnosing the crack to choosing materials, executing the repair, and maintaining your tiles long after the fix is done. You will also learn what common mistakes to sidestep so you get the job done right on the first attempt.
Contents
Before you learn how to repair cracked ceramic tiles, you need to understand what caused the damage so you can prevent it from happening again. Ceramic tile is incredibly durable under compression, but it is surprisingly brittle when stressed unevenly or struck by a hard object. According to the Wikipedia entry on ceramics, fired clay products resist wear well but fracture rather than flex under sudden force, which explains why tiles crack instead of bending.
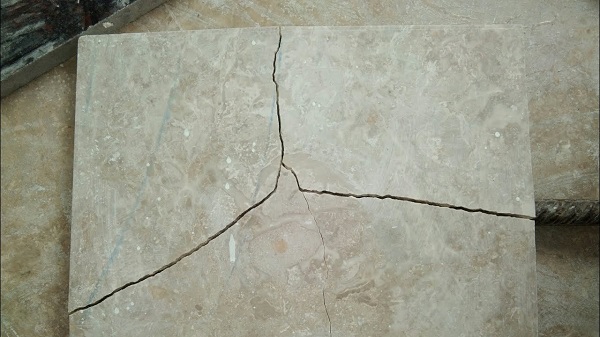
Your subfloor is the foundation beneath your tile, and when it shifts even slightly, the rigid tile above has no choice but to crack. This is especially common in newer homes where the lumber is still drying and settling during the first few years. Concrete subfloors can develop their own hairline cracks over time, and those cracks telegraph straight up through the tile above. You will often notice these cracks running in straight, predictable lines across one or more tiles.
Dropping a cast-iron pan, a heavy tool, or even a full bottle onto a tile floor can cause an instant crack or chip. Point-load stress from heavy furniture legs without protective pads is another frequent culprit, especially on thinner tiles rated for wall use that were mistakenly installed on floors. If you have pets or kids, the chances of impact damage go up significantly over the years, making it worth knowing how often you should be cleaning each room to catch new cracks early.
Grab a flashlight and get down at floor level to inspect the crack closely before you buy any materials. The type, length, and depth of the crack determine which repair method will work best for your situation, and jumping straight to a fix without proper assessment is the fastest way to waste time and money.
Ceramic tile cracks fall into a few distinct categories, and each one calls for a different approach:
Tap gently on the cracked tile and the tiles surrounding it with your knuckle or the handle of a screwdriver. A hollow sound means the tile has lost its bond with the substrate underneath, which means a surface repair alone will not hold. If multiple adjacent tiles sound hollow or you notice the floor flexing slightly when you step on it, the problem is in your subfloor and you need to address that before repairing any tiles. A solid, well-bonded tile produces a sharp, high-pitched tap, while a debonded tile gives a dull, hollow thud.
Now that you have identified your crack type and confirmed the subfloor is solid, it is time to choose your repair method. The right approach depends entirely on the severity of the damage, and working through these options in order helps you pick the least invasive fix that will still hold up over time.
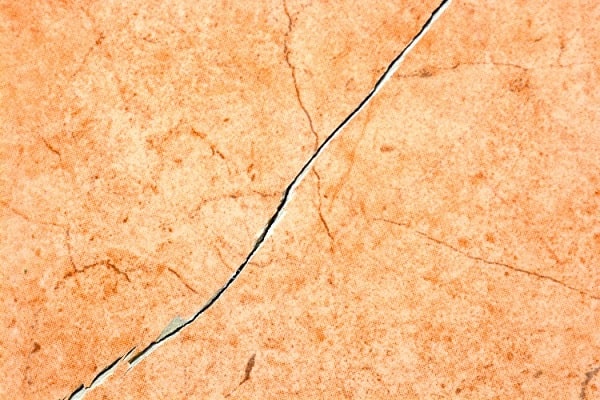
Hairline cracks are the easiest to fix and require the fewest materials. Here is the process that works consistently well:
Pro tip: If you cannot find an exact color match for your tile, mix two or three shades of acrylic paint on a piece of cardboard until you get close, then apply with a fine brush after the epoxy cures.
Chips require a bit more material than hairline cracks because you are rebuilding a missing section of the tile surface. A two-part epoxy ceramic repair kit gives you the best results because it bonds strongly and can be sanded smooth after curing. You want to build up the fill in thin layers rather than packing the entire chip at once, as thinner layers cure more evenly and are less likely to shrink or crack themselves. After the final layer cures, sand it flush and apply a clear urethane sealer to protect the repair from foot traffic and moisture.

If the tile is shattered into multiple pieces, sounds hollow when tapped, or has cracks wider than about 1/8 inch, a surface repair will not hold and you need to replace the entire tile. The replacement process involves scoring the grout lines around the damaged tile with a grout saw, breaking up the tile with a cold chisel and hammer starting from the center, scraping the old adhesive from the subfloor, and setting a new tile with fresh thinset mortar. Always keep a few spare tiles from your original installation for exactly this scenario, because matching discontinued tile colors and patterns years later is extremely difficult.
One of the biggest advantages of learning how to repair cracked ceramic tiles yourself is the dramatic cost savings compared to hiring a professional. Here is what you can expect to spend on materials depending on the repair type:
| Repair Type | DIY Material Cost | Professional Cost | Time Required |
|---|---|---|---|
| Hairline crack fill | $5–$15 | $75–$150 | 30 minutes + cure time |
| Chip repair with epoxy kit | $10–$25 | $100–$200 | 1–2 hours + cure time |
| Single tile replacement | $15–$40 | $150–$350 | 2–3 hours + cure time |
| Multiple tile replacement (3–5 tiles) | $40–$100 | $400–$800 | 4–6 hours + cure time |
| Subfloor repair + tile replacement | $80–$200 | $500–$1,500 | Full day project |
The DIY savings range from 70% to 85% across all repair types, with the biggest percentage savings on simple hairline crack fills. Your biggest investment is the initial purchase of a quality repair kit, which typically includes epoxy, colorant, applicators, and sandpaper for around $15 to $25 and provides enough material for several repairs. If you already have basic tools like a putty knife, rubbing alcohol, and sandpaper at home, your out-of-pocket cost for a hairline repair drops to under $10.
A common scenario involves a single hairline crack running diagonally across a bathroom floor tile, typically caused by the house settling over a few years. In this situation, the tile still sounds solid when tapped and the crack has not allowed any water underneath. The fix is straightforward: clean the crack line, apply clear epoxy, and blend with a color-matched paint pen after curing. The entire repair takes about 30 minutes of active work, and you can walk on the tile again within 48 hours. This kind of repair is virtually invisible once complete, especially on textured or patterned tiles where the surface variation naturally camouflages the repair line.
Kitchen backsplash chips usually come from the handle of a pot or pan swinging back and striking the tile, leaving a small divot that exposes the raw clay body beneath the glaze. Because backsplash tiles are vertical and rarely see direct water pressure, the repair is purely cosmetic but still important because that exposed clay body absorbs moisture and grease from cooking, which stains over time. Using a two-part epoxy kit with a white or off-white colorant fills the chip cleanly, and since backsplash tiles do not bear weight, the repair holds up indefinitely. Keeping your kitchen surfaces clean helps you spot new damage quickly, much like knowing how to maintain your vacuum so it lasts for years helps you catch wear before it becomes a bigger problem.
Even experienced DIYers fall into these traps when repairing ceramic tile cracks, so knowing what to avoid is just as important as knowing what to do:
The single most common mistake is attempting to fix a structural problem with a cosmetic solution. If your tiles are cracking because the subfloor is flexing, you need to reinforce the subfloor with an additional layer of cement board or plywood before the tile repair will hold.
Your tile repair is only as durable as the maintenance routine you follow afterward. Proper care extends the life of the repair and prevents new cracks from forming in adjacent tiles. Here are the maintenance habits that make the biggest difference:
Regular vacuuming is particularly important for tile floors because grit particles trapped underfoot act like sandpaper on the glaze and on any epoxy repairs you have made. If you are shopping for a new vacuum, understanding how to choose a vacuum for hard floors without scratching them helps you protect both your tiles and your repairs from accidental damage during routine cleaning.
These techniques separate a repair that blends in perfectly from one that looks obviously patched, and most of them cost nothing extra beyond the materials you already have:
Temperature matters more than most guides mention when it comes to epoxy curing. Working in a room that is between 65°F and 75°F gives you the best cure results, because cold temperatures slow the reaction and can leave the repair soft, while excessive heat makes the epoxy set too quickly for proper penetration into the crack.
Yes, you can repair most hairline cracks and small chips with a two-part epoxy ceramic repair kit without removing the tile. You clean the crack, fill it with epoxy, let it cure, then sand and color-match the surface. This method works well for cracks that are less than 1/8 inch wide and where the tile is still firmly bonded to the subfloor underneath.
The most common causes are subfloor movement from house settling, impact damage from dropped objects, inadequate adhesive coverage during installation, and temperature fluctuations that cause expansion and contraction. Tiles installed over a flexible subfloor without proper underlayment are especially prone to cracking because the rigid tile cannot absorb the movement.
A properly executed epoxy repair on a hairline crack lasts 5 to 10 years or longer under normal household conditions. The longevity depends on the quality of the epoxy used, how thoroughly you cleaned the crack before filling, and whether the underlying cause of the crack has been addressed. Repairs on wall tiles and backsplashes tend to last longer than floor repairs because they bear no weight.
Repairing is worth it for hairline cracks and small chips, especially when the tile is discontinued or hard to match. Replacement makes more sense when the tile is shattered, sounds hollow when tapped, or when you have matching spare tiles on hand. The cost difference is significant — a DIY repair runs $5 to $25 while professional replacement costs $150 to $350 per tile.
Yes, through-cracks in tiles that are exposed to water, such as shower floors and walls, allow moisture to seep through to the substrate and can lead to mold growth, subfloor rot, and adhesive failure over time. Hairline surface cracks on dry floors pose minimal water risk, but any crack in a wet area should be sealed or the tile replaced promptly.
Two-part epoxy designed specifically for ceramic and porcelain repair gives you the strongest, most durable result. Clear epoxy works well for hairline cracks where you plan to color-match afterward, while tinted epoxy kits are better for chips where you need to rebuild missing material. Avoid using standard super glue, silicone caulk, or wood filler, as none of these bond properly to glazed ceramic surfaces.
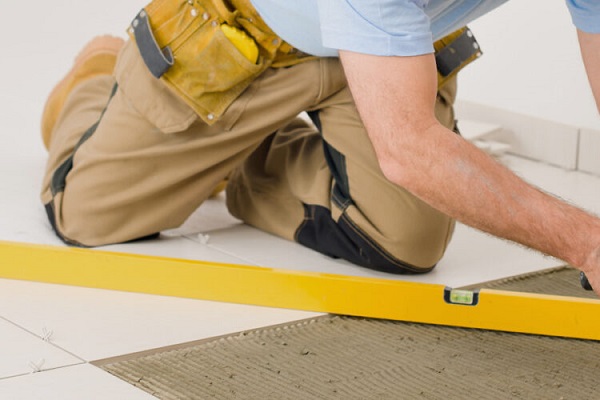
Use an uncoupling membrane (a flexible sheet installed between the subfloor and the tile) during installation to absorb substrate movement. Place felt pads under heavy furniture, avoid dropping heavy objects on tile floors, and maintain stable indoor temperatures to minimize thermal expansion. Proper adhesive coverage during installation — at least 90% contact on floor tiles — is the single biggest factor in preventing future cracks.
Nail polish works as a temporary cosmetic fix for very fine hairline cracks on tiles that do not see heavy wear. It fills the crack line and restores a bit of surface sheen, but it wears away within a few months on floor tiles and does not provide any structural strength. For a lasting repair, use proper ceramic epoxy and apply nail polish only as a final color-matching glaze over the cured epoxy.
You now have every technique you need to handle cracked ceramic tiles yourself, from a quick hairline fill to a full tile replacement. Grab a repair kit, assess the crack in your tile today, and get it fixed before moisture or daily wear turns a minor issue into a costly floor project. Your home's floors and walls deserve the same care and attention you give to every other part of your tidy, productive living space, and a small repair done right now saves you a major headache down the road.
 |
 |
 |
 |

About Liz Gonzales
Liz Gonzales grew up surrounded by art and design in a New York suburb, with both parents teaching studio arts at the State University of New York. That environment sharpened her eye for aesthetics and spatial detail — skills she now applies to evaluating home products where form and function both matter. She has spent the past several years writing about lighting, home decor accessories, and outdoor living gear, with a particular focus on how products perform in real residential settings rather than showrooms. At Linea, she covers lighting fixtures and bulb reviews, outdoor and patio gear, and general home product comparisons.
You can Get FREE Gifts. Furthermore, Free Items here. Disable Ad Blocker to receive them all.
Once done, hit anything below
|
|
|
|